fbpx

New Year, New You

Like most people, I’m looking at January 1st as a fresh start. Over the holidays, I was on the struggle bus in terms of food and did not watch my diet at all. The scale not only noticed the change, but my clothes did too. I got to the point I wouldn’t step on the scale and lived in sweats and my biggest tshirts.

I refuse to step on the scale at this point and I’m trying to not obsess about the number. It only drives me crazy and I get to the point where I weigh myself 10+ times a day (how can THAT be good for anyone??). Enough. Of. That.

So starting January 1st, I am back on track for my life. I found the more prepared I am, the more successful I am. To get started, I google ‘printable calendar’ for whatever month I’m in, print it out and start filling in! This time I printed 2 – one for my meals, one for my workouts.

WORKING OUT

Like any busy mom, it can be so hard to find time to work out, so a quick and effective workout is what I look for. Plus I don’t have time to travel to the gym, so I need something I can do at home that doesn’t require a lot of equipment or space. My favorite at home work out is from BikiniBodyMommy. She has easy to follow workouts for REAL people and gives alternatives for different fitness levels.

Here’s my workout plan for the month:

I didn’t pre-plan any ‘rest’ days because I know there will end up being days here and there I just don’t get the workout in. If I then consider it my ‘rest’ day instead of a missed workout, I won’t beat myself up as much about it.
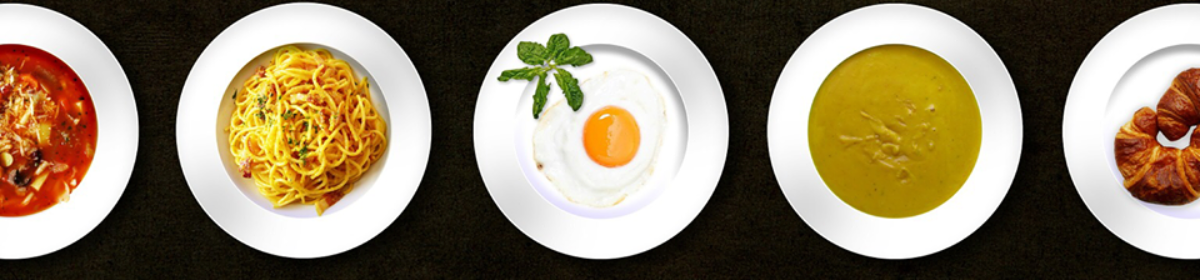
Meal Plan

And for the meals, here’s what that looks like:

There are lots of ‘leftover’ days with how much these meals make and I’m usually the only one eating it! So I end up making two meals – one for me, one for everyone else.

For breakfast and lunch, I like to keep it simple.

Breakfast Ideas:

Lunch Ideas:

  • Leftovers from any breakfast or dinner
  • Lunch meat, veggies, fruit
  • Salad w/ chicken

Dinner Plans for the Month:

Snacking

I think it’s inevitable there will be snacking between meals at some point. Some diets tell you it’s best to snack/eat a small meal every 3-4 hours, other diets say no snacking between meals. So which is right? I think it’s a great question, but there is no ONE right answer. I think everyone’s body is different and it also depends on your lifestyle. I think the best thing is to try out each method, tracking your progress, and see which seems to work better for you. But while we are talking about snacking, here is my plan for what to snack on if I need something between meals

  • Fresh fruits/veggies is always a great go to! Some of my favorites are apple with almond or peanut butter or celery with peanut butter or fresh veggies with ranch
  • Almonds (These are my favorite and perfectly portioned packs!)
  • Honey Roasted Peanuts
  • Beef Sticks
  • Cheese cubes
  • There is so much more you could have that is low carb, but those are my favorites!

We go on our Disney cruise at the end of February and I am determined to lose weight before that!!!

I will post periodic updates with progress, but I’m trying to focus more on how I FEEL than what that scale says. I have fibromyalgia and I have noticed a huge difference in how I feel since I haven’t watched it as closely. I have a lot more aches and pains so we will see how this next month goes.

What is your plan for the new year??

Baking Christmas Goodies 2019

Christmas is by far my favorite holiday and the one I prepare/bake for the most. The toughest decision each Christmas isn’t usually what presents to buy (although it is a tough one!) but what to make for each of the 4-5 Christmas’s we celebrate each year. Do we go with traditions? Try something new?

So this year, it was split. We made 2 traditional items, made some new things, and I made a traditional item of someone else who is no longer with us, as well as one in remembrance of her.  It’s always a collective effort to have everything for each Christmas and every year, I’m the sweets girl.

So here is the rundown of what I prepared for Christmas this year:

If that menu doesn’t put you in a sugar coma, I don’t know what will! And that’s only what I made. There will be an abundance of food from everyone else too.

It made so much food, I think we will be eating leftovers for weeks. Why is it there is always WAYYYY too much food every time we get together? Doesn’t matter if it’s a birthday, holiday, or just because. I always over estimate how much I will need.

So here are pictures of all my goodies. The only thing that I wasn’t crazy about was the Snowball cookies. They just seemed to dry and crumbly. I actually added an egg to the dough too, because it was all dry little crumbles. My daughter loves it, but that is something we probably won’t make again.

If you need any tips for your holiday baking, comment below!

Summer Vacation 2019 – Branson, MO

While just about everyone I know has said ‘I need a vacation’ at least once, sometimes planning a vacation – especially one with kids (and on a budget!) – can be more stressful than the daily life you are trying to escape from!  Over the years, I have definitely learned a few tips and tricks for vacationing that I am always more than happy to share.

Sometimes, deciding where to go on vacation can be the most difficult decision. Like most, I have a bucket list for places I’d love to go – and I hope I’ll get to them all eventually – but for now, we have some more ‘local’ spots we tend to frequent. For this years summer vacation, we will be returning to Branson, MO.

Branson is probably most known for it’s many shows. Musical, variety, magic, acrobatic, and so much more. Despite the many shows, there so many other things to do there as well.  All of these little excursions can sure add up to a lot of $$ though – especially if you have a large family.  So how can you cut costs?

Start by checking out Groupon. You can search by location and see what deals they have. You can get super discounted admission tickets, discounts on food, lodging, and more. And some deals are upwards of 50% off. That is a huge savings!!

For lodging, we are lucky enough to own a timeshare through Capital Vacations. They are always adding new locations and if you are a last minute traveler – you could get a private condo for $100 or less for your entire stay. Definitely worth checking them out! It is a big investment, but if you plan on traveling, it just might be worth it! Want the savings, but not the investment? A timeshare owner like myself can book for you – you just pay the cost!

For our Branson vacation, we have rented a 2 bedroom condo with a full kitchen, living room, washer/dryer. Even if you don’t have a timeshare, it’s worth finding a place that has a kitchen in it. This can help save you loads of $$ by cooking in instead of going out. The washer and dryer is a bonus as well – you can take less clothing and wash/dry it all while you are there.

Another tip is booking a place that already has a pool and/or waterpark there that is free for guests to use. To purchase tickets to a waterpark can be pricey, so if you book a place that has it included, it could definitely help add to your savings.

If you aren’t able to book a place that has the washer/dryer services and just want to try to condense packing as much as possible, try out some compression packing organizers. You can help maximize the space you do have!


Now, some recommended places to see in Branson:

And probably our favorite…


This is a very SMALL sampling of what there is to do in Branson, it’s just a few of our favorites. If you go down to the jet boats, plan for an afternoon of shopping on their pier! Make sure to take plenty of sunscreen!

A few other things you may want top have for the kids if it’s a length drive:

These are just a few tips and tricks to vacation planning and can be applied to pretty much anywhere you go!

Here’s just a few pictures from our last trip:

Keto Berry Muffins

I am a sucker for any sort of baked good. Donuts, muffins, breads, cakes, pies, etc- you name it, I probably have or will eat it! And some people think that Keto takes away the option for you to have all of those things that you love – but I’m here to tell you, it does NOT! Keto isn’t about deprivation. You don’t have to deprive yourself of the foods you love, you just have to learn how to make them – and the more I learn about Keto and make things, the easier it gets!

This muffins are a win in my book. They are moist, sweet, and perfect for breakfast, snack, or a dessert. Anytime you are in the mood for something sweet! The flavor is amazing. I think it is in big part to the almond extract. It gives a very distinct flavor that is oh so good!

Now I call these the Keto ‘Berry’ muffins because you can really use any berry you want in them. You may just need to adjust the nutritional content (or maybe even add in a little more sweetener if your fruit is more on the tart side). Having said that, I think everything is perfect as-is for strawberries. That is my favorite fruit and the one I used for these muffins.

Finished muffings.jpg

Most of the stuff needed for these are staples in any Keto-ers kitchen. Here’s you supply list:


This recipe is pretty simple (per my usual!).

To get started, preheat your oven to 350. You’re going to use two separate bowls. One to mix the dry ingredients and one for the wet ingredients. Mix the wet ingredients until creamy, then add the dry ingredients. Then either mix the strawberries in by hand or on low.

Place the paper liners in 10 of the muffin wells and divide the batter among the 10 liners. Each one should be 2/3 – 3/4 of the way full. Don’t overfill unless you want a mess in your oven! Bake them for 25-30 minutes, or until a toothpick comes out clean. And now try not to eat all of them!!

Oh, and did I mention — only 2 net carbs per muffin!

Keto Berry muffin nutrition.jpg


PRINTABLE RECIPE


Keto Berry Muffins

Prep Time:  5 min
Cook Time: 30 min
Servings: 10
Net carbs per serving: 2

Dry Ingredients:
1 1/2 c almond flour
1 tsp baking powder
1/2 tsp xanthan gum
1/2 c granulated sweetener

Wet Ingredients:
2 eggs
1/2 tsp almond extract
1 tsp vanilla extract
3 tbsp butter, melted
3 tbsp unsweetened vanilla almond milk
1/2 c chopped berries of choice, recommend strawberry

Preheat your oven to 350.In one bowl, mix the dry ingredients in another, mix the wet ingredients except the berries. Mix the wet ingredients until creamy, then add the combined dry ingredients. Once well mixed, you can either mix the strawberries in by hand or on low.

Place the paper liners in 10 of the muffin wells and divide the batter among the 10 liners. Each one should be 2/3 – 3/4 of the way full. Don’t overfill unless you want a mess in your oven! Bake them for 25-30 minutes, or until a toothpick comes out clean.


*Disclaimer: I am NOT a certified nutritionist and your nutritional information may vary depending on exact ingredients you use. I highly recommend you calculate your own and just use this as a guideline. The links for products are affiliate links so I may earn a very small commission if you purchase through them – but it doesn’t cost you anything additional!

Keto Snickerdoodle Crepes

This is one of the recent recipes I’ve made, but I have had so many people ask about it, it jumped to the front of my pile that’s waiting to be posted – and for good reason! These crepes are the BOMB! Whether you are doing Keto or not, they are delicious. And you can eat them as a meal or for dessert!! Crepes are super versatile too, so you can easily change up the recipe to make it how you want.

Now here’s what you need:

THAT’S IT!!

If you’ve been following my blog, you know that I love recipes that don’t require a lot, are simple, and taste delicious. Well, this recipe gets a big fat ✔ on all three of those!

So to get started, you are going to put your eggs, cream cheese, 1 tsp cinnamon, and 1 tbsp granulated sweetener in your blender. (Personally, I like the Ninja single serve blender and use it for a lot of things that are small batches, or smoothies!) Once you have that done, heat your small frying pan over medium heat and throw in a pad of butter (roughly 1/2 tbsp) once it’s warmed up. Give it a few minutes so it gets up to temp. If you put the batter in when it’s too cold, it’s not going to turn out as well.

Pour in enough batter to get about a 6 inch crepe (I got a total of 10 crepes out of my batch, but depending how big you make them, that amount can vary). You’ll give it a few minutes to cook, roughly 3-4. Carefully flip and cook 2 more min. You don’t want to overcook as these will dry out and then be more difficult to roll up.

While those were cooking, I mixed up the filling. Mix the 1/3 cup sweetener and 1 tbsp of cinnamon in a bowl, then add about half of that to the softened butter to make up the spread for the crepes.

Make sure to let the crepe cool before you put the filling in! Remember, it’s butter, so what happens when you put butter on a hot pancake/piece of toast, etc – it melts right in! Well, same thing will happen here! I threw mine in the fridge or freezer to help cool them quicker – frankly these smelled amazing, it was hard not to eat them as they finished!!

Continue frying the batter until you have all your crepes and they are cooled. Then spread about a tbsp of the filling mixture on each crepe, more or less depending on how many crepes you got out of your batch. Then roll them up and put them on a plate until they are all done. Take the remaining cinnamon sweetener mixture and sprinkle over the top. Now, try not to eat the whole platter!

Full disclosure – the first night, I ate them just like that. The second time I made them, I was told I HAVE to try them with syrup. I’m thinking, ‘yeah right, how much better can they be?’. But I did anyways. And then I vowed to never have them without it again. It is not ‘needed’ for this recipe, but so highly recommended!! Get yourself some Walden Farms pancake syrup. You won’t regret it.

And now the BEST part. Seriously, you ready?!

These are only 1 net carb each. Yep, 1!

So now that you know that, seriously try not to eat the whole plate! I dare you.
Crepes with syrup.jpg

You can easily change these up.

  • Add some extract instead of the cinnamon to the batter and/or the butter.
  • Use a cream cheese filling instead of the butter.
  • Add baking powder to the mix to make the crepes fluffier and more ‘pancake’ like. The options are really endless. Comment below if you make these and how they turn out!

PRINTABLE RECIPE


Keto Snickerdoodle Crepes

Prep Time:  5 min
Cook Time: 30 min
Servings: 10
Net carbs per serving: 1

Crepe:
6 eggs
5 oz cream cheese
1 tsp cinnamon
1 tbsp granulated sweetener

Filling:
1 stick (8 tbsp) softened butter
1/3 cup granulated sweetener
1 tbsp cinnamon

Put your eggs, cream cheese, 1 tsp cinnamon, and 1 tbsp granulated sweetener in your blender. Once you have that done, heat your small frying pan over medium heat and throw in a pad of butter (roughly 1/2 tbsp) once it’s warmed up. Give it a few minutes so it gets up to temp. If you put the batter in when it’s too cold, it’s not going to turn out as well.

Pour in enough batter to get about a 6 inch crepe (I got a total of 10 crepes out of my batch, but depending how big you make them, that amount can vary). You’ll give it a few minutes to cook, roughly 3-4. Carefully flip and cook 2 more min. You don’t want to overcook as these will dry out and then be more difficult to roll up.

While those were cooking, I mixed up the filling. Mix the 1/3 cup sweetener and 1 tbsp of cinnamon in a bowl, then add about half of that to the softened butter to make up the spread for the crepes.

Make sure to let the crepe cool before you put the filling in! Remember, it’s butter, so what happens when you put butter on a hot pancake/piece of toast, etc – it melts right in! Well, same thing will happen here! I threw mine in the fridge or freezer to help cool them quicker – frankly these smelled amazing, it was hard not to eat them as they finished!!

Continue frying the batter until you have all your crepes and they are cooled. Then spread about a tbsp of the filling mixture on each crepe, more or less depending on how many crepes you got out of your batch. Then roll them up and put them on a plate until they are all done. Take the remaining cinnamon sweetener mixture and sprinkle over the top. Now, try not to eat the whole platter!


Snickerdoodle crepes nutrition.jpg


*Disclaimer: I am NOT a certified nutritionist and your nutritional information may vary depending on exact ingredients you use. I highly recommend you calculate your own and just use this as a guideline. The links for products are affiliate links so I may earn a very small commission if you purchase through them – but it doesn’t cost you anything additional!

Keto Chocolate Mint Fat Bombs

Since snacking can be a little harder when you are a Keto diet (because there aren’t THAT many thinks on the grocery store shelves that are Keto friendly that actually taste good) – I turn to fat bombs for both snacks and desserts when I want something. Another fat bomb that is easy to make (and you can switch up the extract you put in for different flavors) is a chocolate mint fat bomb – or sometimes referred to as the Andes fat bomb.

Here’s the ingredient list:


The instructions for these are super easy as well (I’ve told you before – I like things that are quick and easy!!)

Combine the dry ingredients – cocoa powder, chocolate protein powder, and powdered sweetener – in a bowl and whisk together til mixed.

Put the coconut manna and coconut oil in another bowl. For the coconut manna, you may have to microwave for about 20-30 seconds to soften it and stir it up. It tends to solidify on the top. Once you have the manna and the oil in a bowl, microwave for 30-45 seconds and stir together. Add in the extract, stir. Once that is mixed, add in the dry ingredients and whisk until it is all incorporated.

Then I used a teaspoon and spooned the mixture into the silicone molds. Put in the refrigerator for about 30 min to an hour until they are set up. They easily pop out of the molds.

I like to store in the freezer and just take 1 or 2 out when I want them. Best part? No carbs!


PRINTABLE RECIPE


Keto Fudge Mint Fat Bombs

Prep Time: <5 minutes
Cook Time: 5 min
Servings: 18
Net carbs per serving: <1

4 tbsp coconut manna
3 tbsp coconut oil
2 tbsp cocoa powder
2 tbsp chocolate protein powder from Kiss My Keto (use code MOMOF2ANDFOODAHOLIC to save 20% off your order!)
1 tbsp powdered lakanto sweetener
1/4 tsp peppermint extract (more or less depending how minty you like them!)

Combine the dry ingredients – cocoa powder, chocolate protein powder, and powdered sweetener – in a bowl and whisk together til mixed.

Put the coconut manna and coconut oil in another bowl. For the coconut manna, you may have to microwave for about 20-30 seconds to soften it and stir it up. It tends to solidify on the top. Once you have the manna and the oil in a bowl, microwave for 30-45 seconds and stir together. Add in the extract, stir. Once that is mixed, add in the dry ingredients and whisk until it is all incorporated.

Then I used a teaspoon and spooned the mixture into the silicone molds. Put in the refrigerator for about 30 min to an hour until they are set up. They easily pop out of the molds.

Fudge mint fat bombs


*Disclaimer: I am NOT a certified nutritionist and your nutritional information may vary depending on exact ingredients you use. I highly recommend you calculate your own and just use this as a guideline. The links for products are affiliate links so I may earn a very small commission if you purchase through them – but it doesn’t cost you anything additional!


Keto ‘Almond Joy’ Fat Bombs

You can never go wrong with chocolate. Throw in coconut and almonds, and I’m all for it! And I’m all for things that are easy to make and my 4 year old helped with a big portion of these – so that tells you how simple they are!

You also don’t need very many ingredients or supplies! Here’s all you need:

  • coconut oil (either refined or unrefined is fine, just depends how ‘coconut-ty you want them)
  • peanut butter
  • cocoa powder
  • shredded/shaved coconut
  • whole natural almonds
  • mini muffin pan (24 ct)

To get started with these, all you have to do is put 3 almonds in each well and top with 1/2 tsp of coconut. Set aside.

In a microwave safe bowl, put the coconut oil and peanut butter. Microwave for 30 second interval, stirring each time, until well mixed. Add it cocoa powder and stir until all incorporated. I recommend using a 8 cup glass measuring cup because you can just pour out the chocolate mixture into each well. Makes it so much easier!

Once you have the almonds and coconut covered, chill in refrigerator for at least an hour. I recommend to store in the freezer and thaw out a couple as you want them!

These are super simple to make and one batch makes 24 fat bombs, only 2 net carbs each.


PRINTABLE RECIPE


Keto ‘Almond Joy’ Fat Bombs

Prep Time: < 5 min
Cook Time: 10 min
Servings: 24
Net carbs per serving: 2

1 cup coconut oil (I prefer unrefined, but either works great!)
1 cup natural peanut butter
3 tbsp cocoa powder
1/4 c shredded coconut
72 whole natural almonds

To get started with these, all you have to do is put 3 almonds in each well and top with 1/2 tsp of coconut. Set aside.

In a microwave safe bowl, put the coconut oil and peanut butter. Microwave for 30 second interval, stirring each time, until well mixed. Add it cocoa powder and stir until all incorporated.

Once you have the almonds and coconut covered, chill in refrigerator for at least an hour. I recommend to store in the freezer and thaw out a couple as you want them!


almond joy fat bombs nutrition.jpg


*Disclaimer: I am NOT a certified nutritionist and your nutritional information may vary depending on exact ingredients you use. I highly recommend you calculate your own and just use this as a guideline. The links for products are affiliate links so I may earn a very small commission if you purchase through them – but it doesn’t cost you anything additional!

Keto Sour Cream & Chive Crackers

There are so many Keto friendly dips out there, but WHAT do you dip in them? Regular crackers and chips are super high in carb. There are a couple options you can find online, but the ones I’ve had so far are NOT very good. So I decided to make my own.

The ones I made for myself I used sour cream and chive, but my husband doesn’t like chives/onions, so I made plain sour cream crackers for him. The plain sour cream ones are perfect to use to dip!

This cracker dough is pretty similar to fat head dough (which is super versatile and a staple of every Keto dieter!).

Here’s your ingredient list and recommended items for this recipe:


PRINTABLE RECIPE


Sour Cream & Chive Keto Crackers

Prep Time: 40 min (including refrigeration time)
Cook Time: 15 min
Servings: 12
Net carbs per serving: 2

1 3/4 c mozzarella cheese, shredded
2 tbsp sour cream
1 egg
1/4 c almond flour
1/4 c coconut flour
2 tbsp chives
2 tbsp butter, melted
1/8 tsp salt

Start by putting the cheese in a microwave safe bowl and heating for 30 second at a time, stirring after each 30 seconds until cheese is melted. Add in sour cream and stir until well mixed. Once mixed, add in remaining ingredients. Stir or use your hands until well combined. Place in the refrigerator for 30 minutes or longer until chilled. This step is very important or the crackers will not roll out/cut easily!!

Preheat oven to 300 degrees. Once your dough has chilled, take a chunk of it (I did 1/4 at a time and left the rest in the fridge so it doesn’t soften) and roll it between two pieces of parchment paper. Roll to about 1/8 or 1/4 inch thick. Use your mini cookie/cheese cutters or a knife and cut out small crackers. Place the silicone mat on the cookie sheet and then place the crackers on the mat. You can put these pretty close together, they do not puff out/spread much at all. You can brush with melted butter and sprinkle with salt if desired. I did not do this part and they came out great!

Bake for 12-15 minutes or until browned. Remove and cool. Store in airtight container. You may have to adjust your cooking times depending on your oven. Play around with what works best for you, some ovens run hot. You want these to dry out and cook. If you cook too high, you’ll end up with it dark around the edges and soft in the middle.


Keto Sour Cream & Chive crackers Nutrition


*Disclaimer: I am NOT a certified nutritionist and your nutritional information may vary depending on exact ingredients you use. I highly recommend you calculate your own and just use this as a guideline. The links for products are affiliate links so I may earn a very small commission if you purchase through them – but it doesn’t cost you anything additional!

Keto Meatloaf Cups

Winter time is full of comfort food (like my instant pot Keto chili) and another of our favorite comfort foods I have recently Keto-fied, is my meatloaf recipe. Luckily, my original recipe only needed some sight modifications to become Keto friendly.

You don’t need much for this simple recipe either. One thing I did do differently this time, is use my KitchenAid Mixer to mix everything instead of using by hand. Either method is fine, but this just kept my hands a little cleaner!


So here’s what you need:


This recipe really can’t get much easier to put together.

Preheat your oven to 350 degrees. While that is heading up, place all ingredients in KitchenAid Mixer or a large mixing bowl and mix until all ingredients are incorporated.

Spray wells of the 12 cup muffin tin with a non-stick spray or brush with oil. To fill the wells, I use a cookie scoop and put two scoop fulls in each well, pressing in. I got 18 out these. Depending how full you fill them, you may get 1-2 more/less.

Place in preheated oven and cook for 25-30 min, or until no longer pink in the middle.

I topped mine with a little more No Sugar Added Ketchup.


PRINTABLE RECIPE


Keto Meatloaf Muffins

Prep Time: 5 min
Cook Time: 30 min
Servings: 9 (2 meatloaf muffins per serving)
Net carbs per serving: 1

Preheat your oven to 350 degrees. While that is heading up, place all ingredients in KitchenAid Mixer or a large mixing bowl and mix until all ingredients are incorporated.

Spray wells of the 12 cup muffin tin with a non-stick spray or brush with oil. To fill the wells, I use a cookie scoop and put two scoop fulls in each well, pressing in. I got 18 out these. Depending how full you fill them, you may get 1-2 more/less.

Place in preheated oven and cook for 25-30 min, or until no longer pink in the middle.


Nutrition meatloaf cups


*Disclaimer: I am NOT a certified nutritionist and your nutritional information may vary depending on exact ingredients you use. I highly recommend you calculate your own and just use this as a guideline. The links for products are affiliate links so I may earn a very small commission if you purchase through them – but it doesn’t cost you anything additional!

Keto Chicken Cauliflower Fried Rice

Chinese food is probably one of my favorites and fried rice was a staple of my diet before. I don’t think I ever went out for Chinese or ordered and DIDN’T get fried rice. But as you may already know, rice is VERY high in carbs – roughly 45 carbs per cup.  As someone who typically eats 20 carbs or less per day, that would be a huge no-no. Cauliflower rice is an excellent substitute and runs about 5 carbs per cup.

Since I couldn’t just order cauliflower fried rice from the local restaurant, I had to make my own. This recipe is SO simple and a total of 9 ingredients. If you don’t have one, you’ll need a large skillet.

Ingredient List:

  • 2 bags frozen Birds Eye Riced Cauliflower
  • Sesame oil
  • boneless skinless chicken thighs and/or breasts
  • chopped broccoli (fresh or frozen)
  • minced garlic
  • egg
  • soy sauce
  • carrot sticks

Start by preheating the large skillet over medium heat. Use about a tbsp of your choice oil (recommend avocado oil or EVOO). While that is heating up, preheat your oven to 350. You’re going to bake your chicken until it is done (roughly 30 minutes).

Once your skillet is heated, dump in the frozen riced cauliflower with the garlic. If you are using frozen broccoli, add that in now. Continue cooking until veggies begin to get tender about 8-10 minutes, then add the carrots. Continue cooking another 5 minutes, until carrots soften. I turned up the heat and cooked until it started browning a little.

While this is cooking, I put my cooled chicken in a food processor and pulsed to get nice small pieces to mix in with the rice. Once shredded, add the chicken in with the rice.

Ground chicken for rice

Mix together. Push rice mixture to the outside of the pan. In a small bowl, beat an egg. Put a little oil or use cooking spray in the center of the pan, then add the egg and cook til scrambled. Once cooked, mix together. Add in the sesame oil and soy sauce, salt and pepper to taste.

That’s it! You’ve now made Keto chicken cauliflower fried rice!

Bowl keto fried rice


PRINTABLE RECIPE


Keto Chicken Fried Rice

Prep Time: 5 min
Cook Time: 35 min
Servings: 6
Net carbs per serving: 3

2 bags Birds Eye riced cauliflower
1 boneless skinless chicken thigh, 1 boneless skinless chicken breast (or any combination of 2)
3/4 c chopped broccoli (fresh or frozen)
2 tsp minced garlic
1/3 c shredded carrots
1 egg
1 tbsp soy sauce
1 tbsp sesame oil

Start by preheating the large skillet over medium heat. Use about a tbsp of your choice oil (recommend avocado oil or EVOO). While that is heating up, preheat your oven to 350. You’re going to bake your chicken until it is done (roughly 30 minutes).

Once your skillet is heated, dump in the frozen riced cauliflower with the garlic. If you are using frozen broccoli, add that in now. Continue cooking until veggies begin to get tender about 8-10 minutes, then add the carrots. Continue cooking another 5 minutes, until carrots soften. I turned up the heat and cooked until it started browning a little.

While this is cooking, I put my cooled chicken in a food processor and pulsed to get nice small pieces to mix in with the rice. Once shredded, add the chicken in with the rice. Mix together. Push rice mixture to the outside of the pan. In a small bowl, beat an egg. Put a little oil or use cooking spray in the center of the pan, then add the egg and cook til scrambled. Once cooked, mix together. Add in the sesame oil and soy sauce, salt and pepper to taste.


Nutrition for fried rice


*Disclaimer: I am NOT a certified nutritionist and your nutritional information may vary depending on exact ingredients you use. I highly recommend you calculate your own and just use this as a guideline. The links for products are affiliate links so I may earn a very small commission if you purchase through them – but it doesn’t cost you anything additional!